Creating Basic Funnels in CloudFunnels
Hello Folks, today I will guide you on how to create a funnel in CloudFunnels. CloudFunnels makes it really easy for you to create funnels.
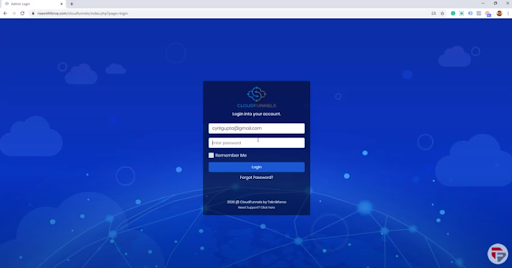
So the first thing is to go to the location where you installed CloudFunnels. If you don’t have any funnels setup you are going to see the Login screen.
Watch the Video
First, you need to log in. Put in your id and password.
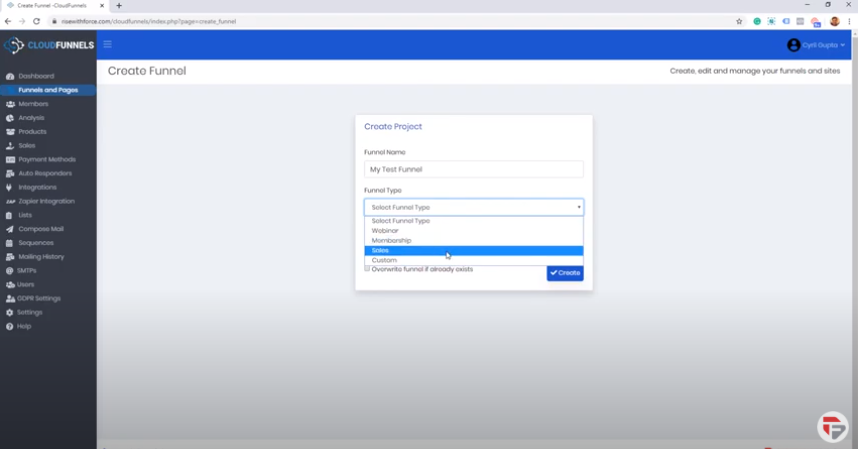
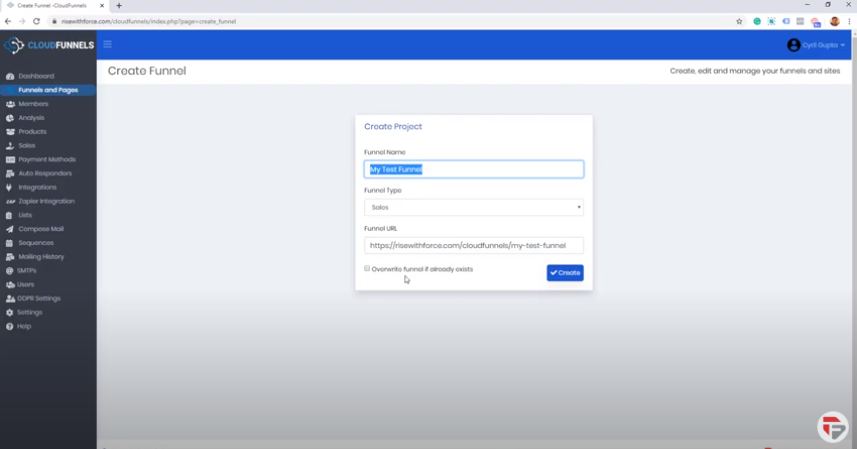
Step 1. Give a name to your funnel.
- I’ve named it My Test Funnel
Step 2. Select the funnel type. There are different types of funnels like
- Webinar
- Membership
- A sales funnel
- Custom Funnel (Define the pages you want to put in that funnel)
The funnels templates are pretty adaptable you can choose anything for anything but when you choose a funnel type it gives you a recommended set of pages.
- I’m gonna start off with a sales funnel.
Step 3. Select the URL
- I’ve installed CloudFunnels on a web location and I can install multiple cloud instances in multiple folders.
What you can effectively do is have a website where you have got different instances of CloudFunnel in different folders. So maybe the main website is a blog but you have CloudFunnels installed in a folder called maybe a store or something.
You don’t have to change your entire domain or subdomain to set up a CloudFunnel instance.
You can select the funnel URL it automatically picks up a default URL based on the funnel name but if you want to change it you can do so.
There is also another option of Overwrite Funnel if Already existed and you can use it if you want to replace an existing funnel.
So if you’ve already done a setup of the funnel and for some reason, you want to create a new one from scratch you can do that. If it’s your new funnel you don’t have to do that.
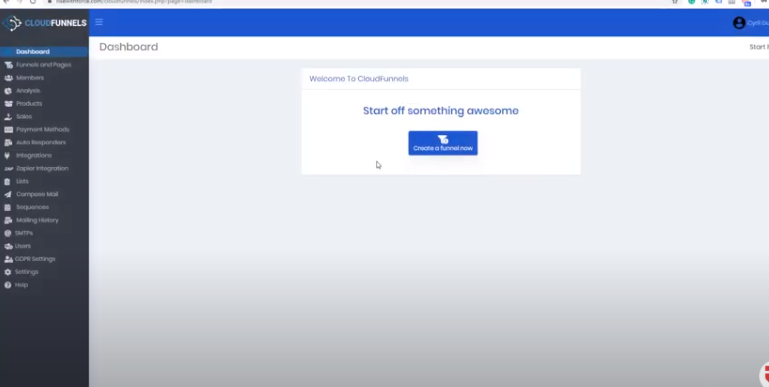
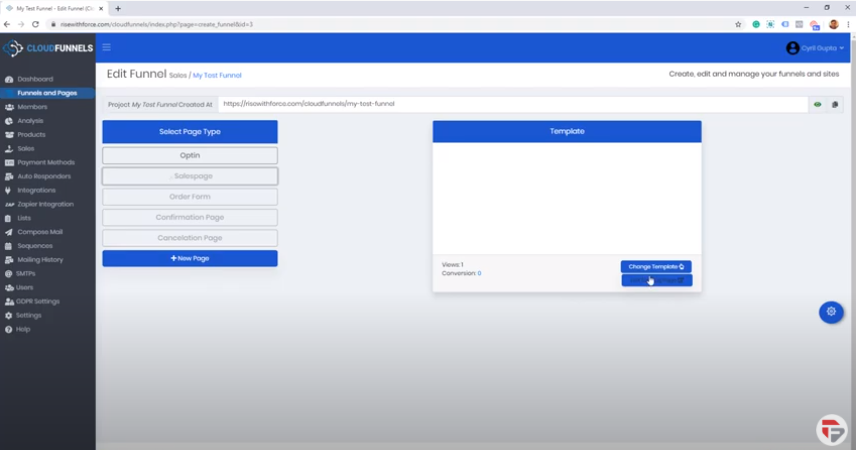
In just a matter of seconds, you will get your funnel templates right in front of your screen.
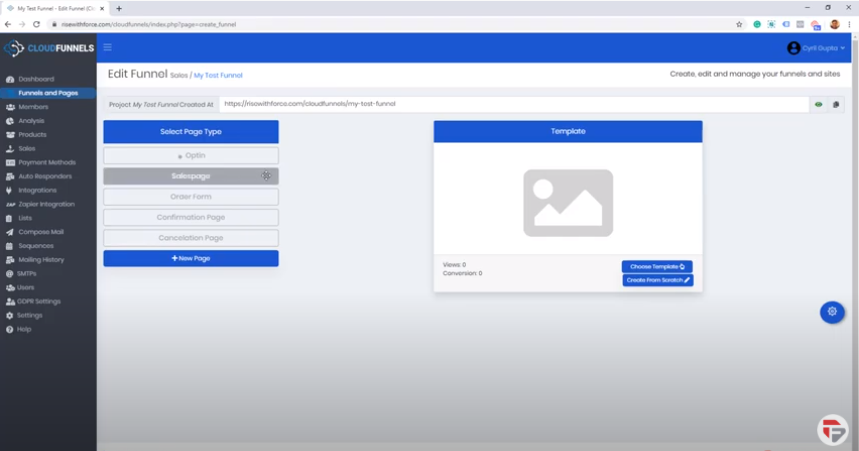
You can see the pages that are available for you:
- Optin Page
- Sales Page
- Order Form
- Confirmation Page
- Cancelation Page
First, we will set up an Opt-in Page
There are two options to set up an opt-in page:
- You can start up from scratch, use the CloudFunnel editor to create a page from scratch many people do that it’s very easy to use.
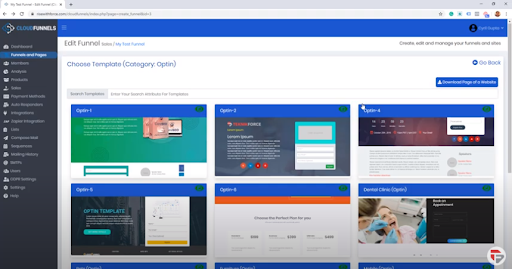
- You can pick from one of our pre-existing templates and to do that just click on the choose template button. You will see a list of templates that are already available to you.
This list of templates is ever-growing. We are going to introduce a huge number of templates for every kind of niche and you will continuously see new templates coming to you if you are a pro member of CloudFunnels.
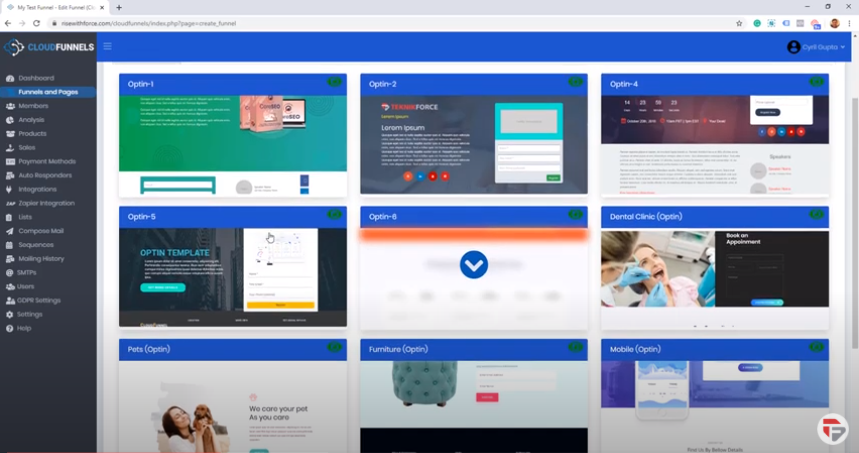
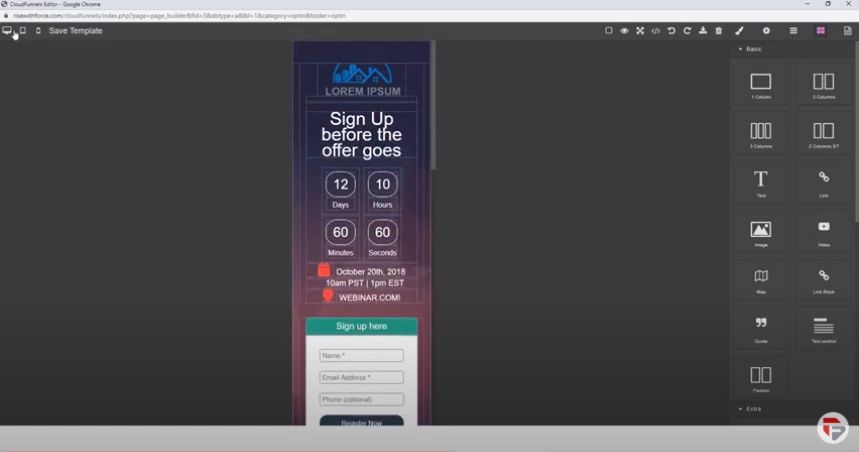
To give you a brief overview I’m gonna select Optin 4 and in few seconds it will be downloaded in your CloudFunnels Installation.
You should see the preview of the template here
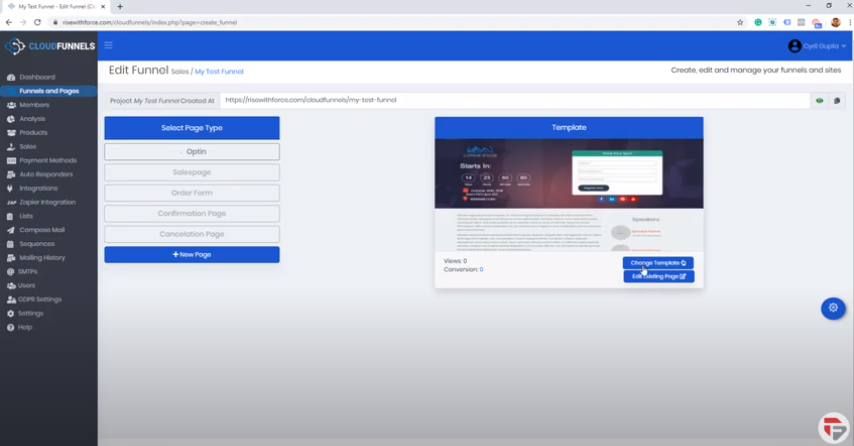
To tailor it to our page or our audience you can just click on the Edit Existing Page Button
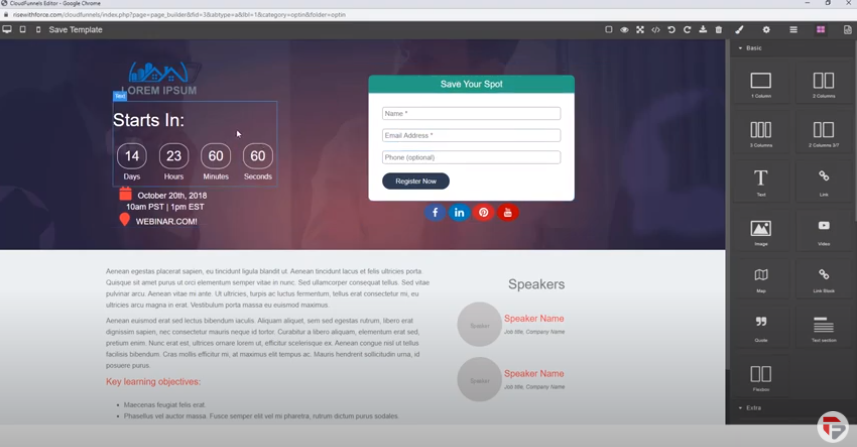
It will Load up our template in the editor. This is a very powerful editor. It’s got every feature that you would want from a capable Cloud Editor.
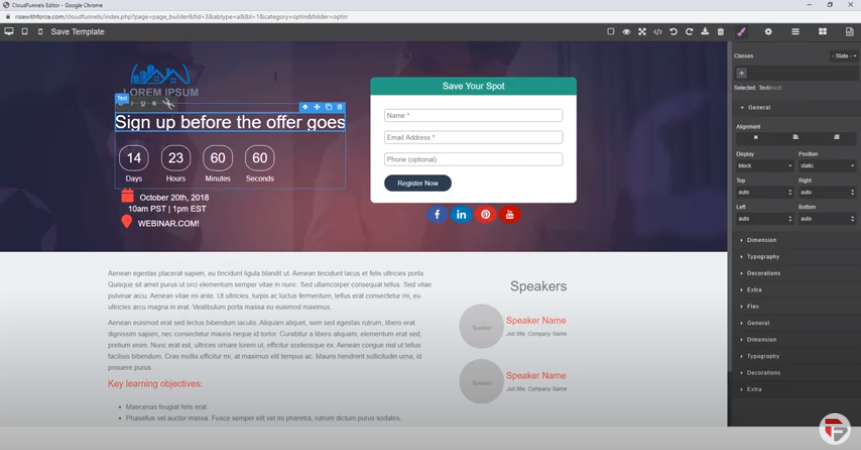
You can change a number of things.
- You can change any text by just clicking on the text and change it the way you want it.
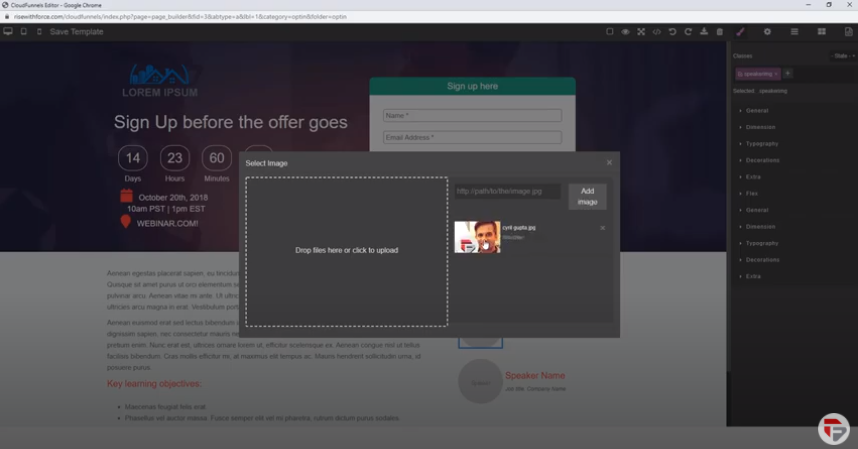
- Similarly, you can also change any image from the page. Double click the area and upload the image from your computer and that’s it!
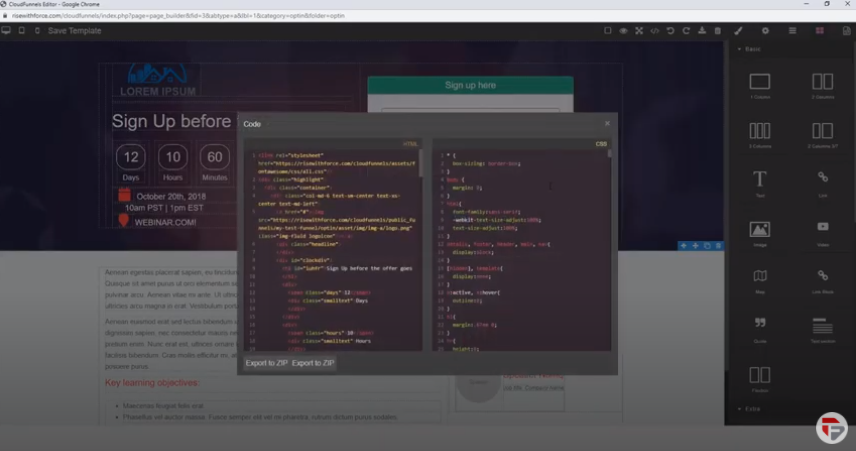
This editor gives you a number of capabilities. When you click here you will see a number of different elements, images, text style and you can even use CSS.
- It got a lot of different options like :
- You can preview the page
- You can even see responsive designs like how it will look on a mobile phone
It is very easy to use it and if you are someone technical you can even modify the HTML and the CSS or you can ask your technical guy to do the same.
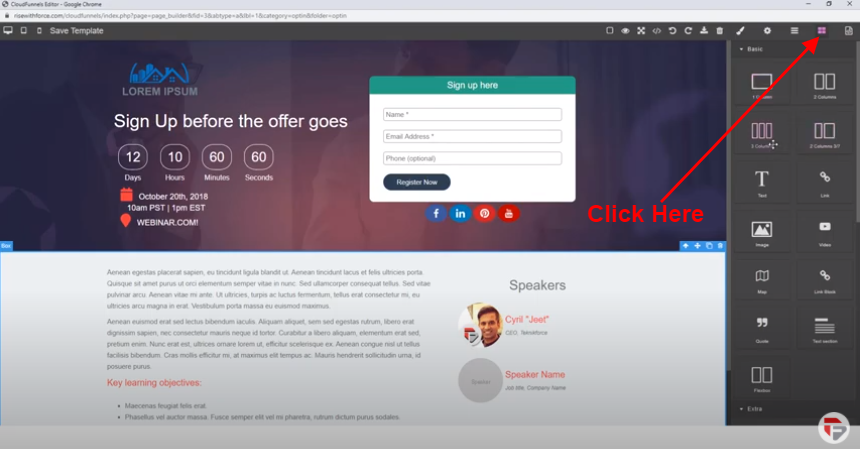
When you are done just click on Save Template.
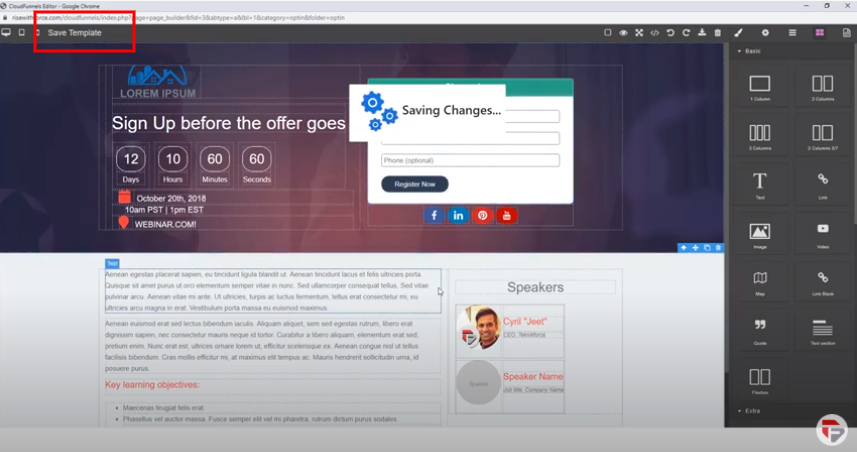
It’s gonna update the preview so when you go back to cloudfunnels after saving you will find your page has changed. You will be able to visit it on the live website.
And if you go back to CloudFunnels you will see your template has been updated and it reflects the current preview.

Now I will guide you on how to use an Optin page from the existing Optin pages you have or how to use your existing funnel.
To do that go back to the Optin page
- Click on choose template
- Click on the Download page of a website
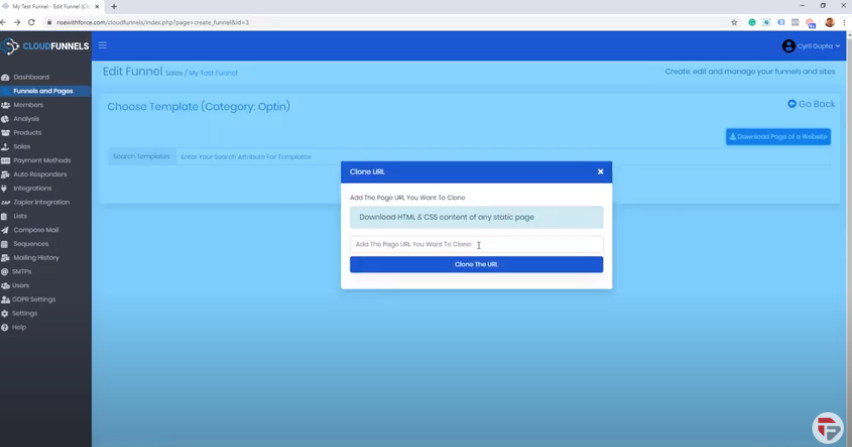
- Put in the URL (If you’ve got an optin page that you want to use put that URL)
- Click on Clone the URL
Now what CloudFunnels is going to do is it will download that page, it will download the HTML, the CSS, all the images, and it will set up that page as a readymade template that you can instantly modify.
It’s a quick way to duplicate your funnel or in fact, any page that belongs to you or you have rights of inside the CloudFunnels without having to do any kind of manual work.
This is how easy it is to set up a CloudFunnel and similarly, you can set up all the other pages.
If you want to set up a sales page, click on the sales page and again click on either edit an existing page or choose a template.
Important Points to keep in mind
You can have multiple funnels inside one installation of CloudFunnel
There are settings that you can further explore like
- A/B Testing
- Display GDPR Cookie ( if you are targeting European people)
- You can have cash pages
- You can have AMP Pages, now AMP is something which is extremely amazing. All our templates are AMP compatible. (So Google AMP is going to make your mobile pages that much faster, Google is going to catch them and you will be ranking higher in Google search results and CloudFunnels is the only funnel system that supports AMP)
- Send Leads to Zapier
- You can connect to lists, memberships, autoresponder, and you can have custom integration too
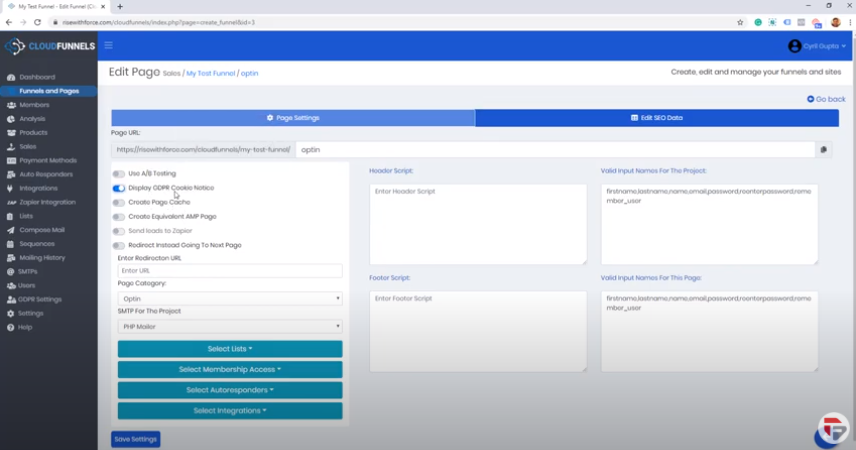
- You can put in your own custom JAVA Script. So if you want to put in your Google Analytics, Facebook Pixels, Conversion Pixels, or anything else that is JAVA Script. Put it in the Header Script.
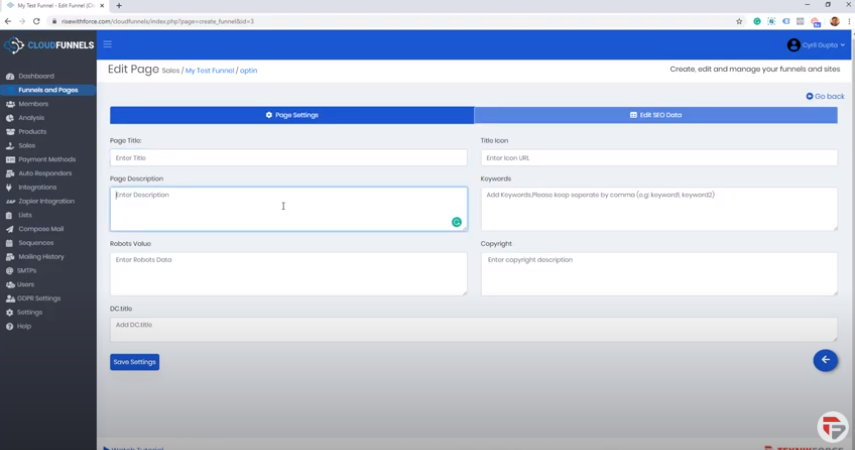
- CloudFunnels is 100% SEO Optimizable. It will let you put in the
- Page title
- Page description
- Robot value
- Keywords
- Title icon
- Copyright
- All of the things that you will need to put to rank higher on Google and give people who find you on search reason to click on you